
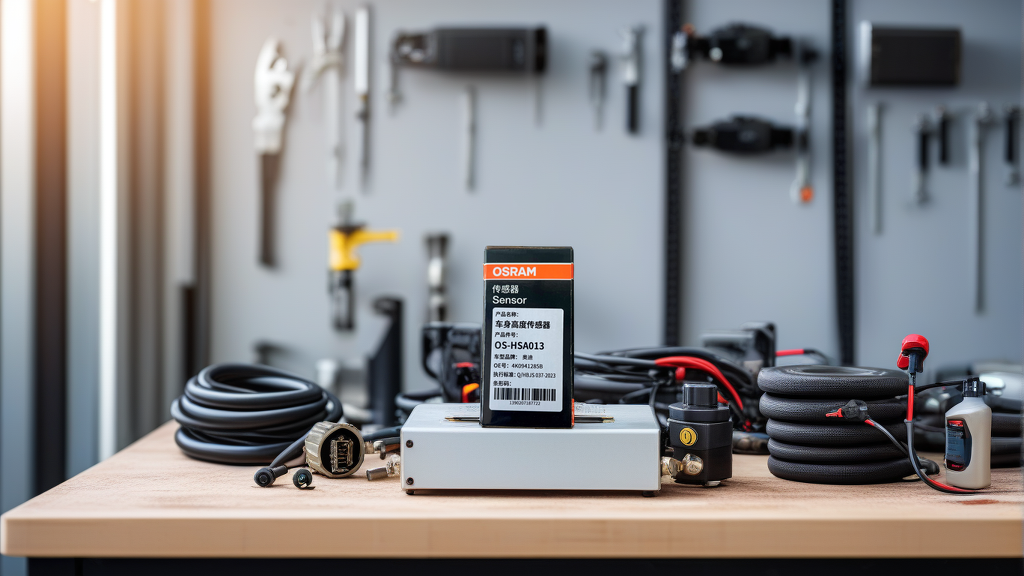
Walk into any European specialty shop on a Tuesday morning, and the complaint is almost predictable: “My 2021 Audi A6 sits crooked on the driver’s side, and the adaptive headlights are throwing errors on the dash.” You grab the scan tool, pull code C10DA12 — ride height sensor implausible signal. The customer wants it fixed by Friday. The part? OE# 4K0941285B, which crosses to the OSRAM OS-HSA013 ride height sensor. This isn’t a part you can fudge with a generic universal sensor and a zip tie. Audi’s adaptive suspension and self-leveling headlights depend on precise feedback, and swapping this sensor requires more than just a ratchet and a prayer.
Here’s the breakdown for the working technician — step-by-step replacement, the torque specs that actually matter, and the mistakes that turn a 45-minute job into a come-back.
Diagnosis First, Parts Second
Before you write that repair order, confirm the failure. A bad ride height sensor on the Audi MLB Evo platform (C8 A6, A7, A8, Q7, Q8, and the S/RS variants) typically presents with one or more of these:
- Vehicle sits lower on one corner when parked overnight
- Adaptive suspension sets a “level control malfunction” warning
- Matrix LED headlights aim too low or too high
- A diagnostic fault in the level control module for that specific corner
The rear left sensor (which the 4K0941285B covers) is especially exposed. It mounts near the lower control arm on the driver’s side, right in the path of road grit and winter road salt. The plastic linkage arm snaps, the internal potentiometer wears out, or moisture gets past the seal. A visual check often confirms the issue: a broken arm, a loose ball socket, or corrosion on the connector pins.
If the linkage is intact but the sensor is throwing erratic values, don’t chase wiring until you’ve swapped the sensor. These are known to fail internally even when they look fine externally.
Tools Needed — No Surprises, But No Shortcuts
You can do this on a lift or on ramps. A lift makes the upper bolt easier to access, but I’ve done it on the ground with the car supported on jack stands. Here’s the tool list:
- 10mm socket and ratchet (for the linkage arm pinch bolt)
- T25 Torx bit (for the lower sensor mounting bolt)
- T30 Torx bit (for the upper sensor mounting bracket bolt)
- Trim panel removal tool (for the wheel well liner)
- Needle-nose pliers (to pop the linkage ball socket off the control arm)
- VCDS or ODIS or equivalent scan tool (for calibration after replacement)
- Torque wrench capable of 8 Nm (6 ft-lbs) — you’ll see why this matters
You don’t need special pullers. The ball joints on the linkage arm are plastic and pop off with a firm sideways nudge. If you pry on them with a screwdriver, you will crack the socket and need a new linkage. Ask me how I know.
Step-by-Step: The Right Way
1. Position and Secure the Vehicle
Park on level ground. Raise the vehicle and support the rear driver’s side corner. The suspension needs to be at normal ride height with the weight on the suspension for the calibration step, so if you’re using a lift, keep the suspension loaded by placing a jack stand under the control arm. Don’t let the wheel hang free.
2. Remove the Wheel Well Liner
There are five or six push-pins and one 8mm bolt holding the rear portion of the liner in place. You need access to the sensor bracket, which is mounted just above the lower control arm and behind the spring seat. The liner pops out in about two minutes.
3. Disconnect the Old Sensor
Unplug the electrical connector first. There’s a red locking tab that slides outward, then you depress the connector latch and pull. Don’t twist. Unclip any cable ties holding the wiring harness to the bracket. Then remove the pinch bolt on the linkage arm — that’s the 10mm bolt. The arm slides off the sensor shaft. Now hit the two T25/T30 mounting bolts. One holds the sensor to its bracket, the other holds the bracket to the subframe. The old sensor comes off.
4. Install the OS-HSA013
Line up the OSRAM sensor on the same bracket. It’s a direct OE replacement — the bolt pattern, the connector shape, and the orientation of the sensor shaft all match the factory VDO unit. Install the lower bolt to 8 Nm. Install the upper bracket bolt to 10 Nm. Hand-tighten the pinch bolt on the linkage arm to 4 Nm — that’s just snug. Over-tightening that pinch bolt cracks the linkage arm or strips the shaft.
5. Set the Linkage Position
This is where most techs mess up. The sensor shaft has a flat side. The linkage arm must be positioned so the sensor is roughly in the middle of its travel when the suspension is at normal ride height. If you install the arm at the extreme end of the sensor’s rotation, you’ll set a fault the moment the suspension moves. Align the flat on the shaft with the flat in the arm, rotate the sensor to the mid-point position, then slide the arm on. Tighten the pinch bolt to 4 Nm.
6. Calibrate
Plug in your scan tool. Navigate to the level control module (address 34 on most C8 platforms). Select “Basic Settings,” then “Calibrate Ride Height Sensors.” The system will zero out the offset. Some SDI vehicles require a manual ride height measurement at the center of the wheel arch to the ground, but most 2021+ models do it automatically if the vehicle is on level ground. Confirm the fault codes clear. Cycle the ignition. Test drive.
Pro Tip: If you clear fault codes and the yellow level control light stays on, you forgot to load the suspension. Put a floor jack under the control arm and raise the wheel to normal ride height before the calibration routine. The controller needs to see the suspension at its correct working height to accept the new sensor’s voltage range.
Torque Specs That Save You a Second Visit
| Fastener | Torque |
|---|---|
| Sensor-to-bracket bolt (T25) | 8 Nm (6 ft-lbs) |
| Bracket-to-subframe bolt (T30) | 10 Nm (7 ft-lbs) |
| Linkage arm pinch bolt (10mm) | 4 Nm (3 ft-lbs) |
| Wheel well liner push-pins | Hand tight |
Those numbers are not optional. The sensor mounting bolts are small, and the subframe bracket bolts are into aluminum. Crank them to 12 Nm and you’re either stripping threads or snapping the bracket ear. On the linkage arm, 4 Nm feels barely finger-snug, but that’s correct. The bolt deforms a nylon patch on the threads; if you exceed it, the arm fractures.
Common Mistakes to Avoid
Mistake #1: Reusing a broken linkage arm. If the old sensor failed because the plastic arm snapped, don’t just replace the sensor and clip the arm back on. The linkage arm absorbs road vibration and thermal expansion. A cracked arm will fail again in six months. The OS-HSA013 sensor comes with a new linkage arm included. Use it.
Mistake #2: Skipping the calibration. You can replace the sensor, clear the codes, and drive away. The car might even level itself temporarily. But the adaptive headlights will aim poorly, and the vehicle may lower at highway speed to reduce drag, then fail to raise back up. Always calibrate.
Mistake #3: Installing without the ball socket properly seated. Pop the arm onto the control arm stud. Listen for the click. Pull on it lightly. If it’s not seated, it will fall off on the first pothole and you’ll have a dangling sensor and a lit dash.
Mistake #4: Using a used OE sensor from a salvage yard. This is a false economy. The potentiometers wear with mileage, and the plastic linkages degrade with age. A used sensor is a time bomb. The OSRAM aftermarket equivalent is a new part, often cheaper than a used OE pull on eBay, and you get the full wiring pigtail and linkage assembly.
The OS-HSA013 in the Real World
I’ve installed these on three C8-chassis Audis now — a 2021 A6 allroad, a 2022 S7, and a 2023 Q8. All three had failed rear left sensors. The OSRAM part fit identically to the factory VDO unit. The connector locked in with the same positive click. The calibration sequence completed on the first attempt each time. No intermittent faults after two months of follow-up.
If you’re sourcing parts for a shop, or you’re a serious DIY owner with VCDS, the OS-HSA013 is the replacement to stock. It’s not a “will this work?” part. It’s a “this is the same as the factory part, minus the four-figure dealer markup” part. For the Audi owner who keeps the car for the long haul, and for the shop that doesn’t want warranty comebacks, this is the ticket.
Bottom Line for the Buyer
The OS-HSA013 | OSRAM Ride Height Sensor | Fits Audi | OE# 4K0941285B from OSRAM is a direct-fit solution for the Audi 4K0941285B ride height sensor. It replaces the original sensor with the same build quality, includes the necessary linkage arm, and costs roughly 60% of what a dealership will quote you. Combine it with a standard calibration procedure and 8 Nm of torque discipline, and you’ll fix the ride height fault the first time. No headlight aiming issues, no false low-level warnings, no second visit.
For the shop ordering in bulk or the owner tackling the repair at home, this is the sensor to buy. Keep a couple on the shelf — Audi’s suspension systems aren’t getting simpler, but at least the replacement is.